I’ve mentioned before my other life as a home baker before. Naturally, I loved to plan my desserts based on the seasons. It was July and I was trying to plan my fall menu and that was when I was inspired by a the best apple cake with my grandparents, I thought about how perfect something salty would be to offset the sweetness. Salted caramel would give a new depth, perfect for fall and winter, and gives the nostalgia of a caramel apple. Plus with apples being in season during the fall, it timed out perfectly.
Caramel apples was my absolute favorite dessert when my mom and I would go to Six Flags Over Texas (theme park) and I loved them so much my mom and I would make them at home. So developing this salted caramel to add to my apple cake was a great way to elevate my grandmother’s cake while paying homage to my mom.

There are some tools that make cooking and baking super easy. I will list a few here a few tools (affiliated links) that will allow me to earn a small commission if you decide you want to make a similar decision as I did and purchase some of these great products (Win Win!).
Table of Contents
Time/Temperature Control
Because I was selling my baked goods to people, I made sure to find recipes that were not time/temperature controlled for safety (TCS). Meaning that the recipes didn’t need to have refrigeration to keep from spoiling.
These recipes were so important to me getting started out and I still refer to them often. One of my favorite of those recipes referred to another one of my favorite bloggers, Sally’s Baking Addiction, and her salted caramel. The recipe I am going to share is inspired based on her recipe but I have made a few tweaks to make it my own.
Why You Will Love This Recipe
This salted caramel recipe is incredibly simple. The base is only four ingredients. Sugar, Butter, Cream, and Salt. This recipe is also incredibly adaptable in that you can add a few embellishments (vanilla sugar or bourbon) and it is adds new depth and complexity to the caramel.
On that same note, because it is so incredibly simple, it has relatively clean ingredients. Obviously not going to be sugar free, but I can make a salted caramel for 4 ingredients, versus the leading grocery store caramel has 10 ingredients. Plus who knows what those “Natural Flavors” actually are.

The other nice thing is that there are no crazy tools you have to use. A pot, wooden spatula, a thermometer (to make sure all of the water is out), a sieve to remove any bits of hardened sugar, and a Pyrex (or other heatproof dish) to catch the caramel from the sieve.
And of course, while I already mentioned it, this salted caramel is time/temperature stable. Meaning that if you are making some this holiday season (or for whenever!) you can easily leave it on your counter for a couple weeks at room temperature, or if you aren’t sure if you will use it by then, it’ll last a month or two in the fridge and then a three-four months if you decide to freeze it. Because I can leave it on my counter, I get to keep my lovely refrigerator/freezer space to myself.
Because it can last for so long (just because it can last that long doesn’t mean it will!) it also makes for great home made gifts. I brought a bourbon salted caramel up to work to go on top of a pumpkin pie a few years ago and my lovely coworkers were adding it to everything (even their beans! ). Because it was so well received I also as part of a glaze for my Sourdough Cinnamon Rolls, which was also a hit at the office. I will be making some more caramel this winter and giving them as gifts to those coworkers who showed such a fondness for it.

My only wish is that it was able to be readily canned/preserved. Even though it has a low water content due to the high amounts of sugar, due to the lack of acidity, it’s not considered to be safe to water bath, and because of the high sugar/cream it’s inclined to burn if you try to pressure can it. However, what you do in your kitchen is your business.

Getting Saucey (How to Make the Sauce)
You can easily make all (or at least most) of the salted caramel for a month in about 15 minutes. You will need a small sauce pot, I recommend stainless steel (not nonstick), 1 cup of sugar, 6 tbsp of softened butter cut up into 4-6 pieces, 1/2 cup of heavy cream warmed to room temperature and 3/4 tsp of salt. You will also need a wood or silicone spatula, a thermometer isn’t required but helpful, and a sieve to remove any crunchy bits of sugar left over
Over medium high heat, add your sugar to your pot and stir frequently. In the beginning it can be less frequent, but just make sure you are stirring enough to keep it from burning. Don’t forget to scrape down the sides of the pot! As you’re stirring, you’ll notice the sugar starting to clump to itself and starting to melt. This is what we are looking for! Keep stirring and gradually increase the frequency.
I like to jab the sugar blocks that form with the spatula to get rid of any additional aggression and to help make sure that the sugar melts evenly.


After about 5-7 minutes of doing this, your sugar should be close to an amber color. You have to remember you are essentially playing a game of chicken when it comes to caramel. The sugar wants to burn and you don’t want it to. But you have to let it fully dissolve. While you are stirring and breaking up the sugar, don’t hesitate to lower the temperature (or turn it off) for a minute or two to work on making sure the sugar is dissolved.
Once most of the sugar is dissolved in itself, turn off your heat add your butter in chunks letting it dissolve as you add more. The sugar is very hot so it shouldn’t take long. It will bubble and create steam as it is added and the water evaporates out.
Return to low heat and make sure everything is incorporated. If for whatever reason your butter and sugar separates out, keep stirring. It will come back together even if it takes a few minutes. If you were worried about burns or splatter during this part, consider getting some cooking mitts/gloves before adding the cream.
Once everything is smooth over low heat slowly add the cream. It will bubble profusely as it heats up. If it is warm or close to room temperature, it will not bubble quite as much, but still be careful as you are stirring. Keep the kiddos away while you do this.

Once you add all of the cream, increase the heat to medium and allow it to cook for one minute without stirring. Once that is done you can remove from the heat and stir in 3/4 teaspoon of salt.
You probably don’t need to use your thermometer, especially if your caramel was pretty angry, but I like to be as precise as possible and measure the temperature. If it is above 220 it is good to be stored.
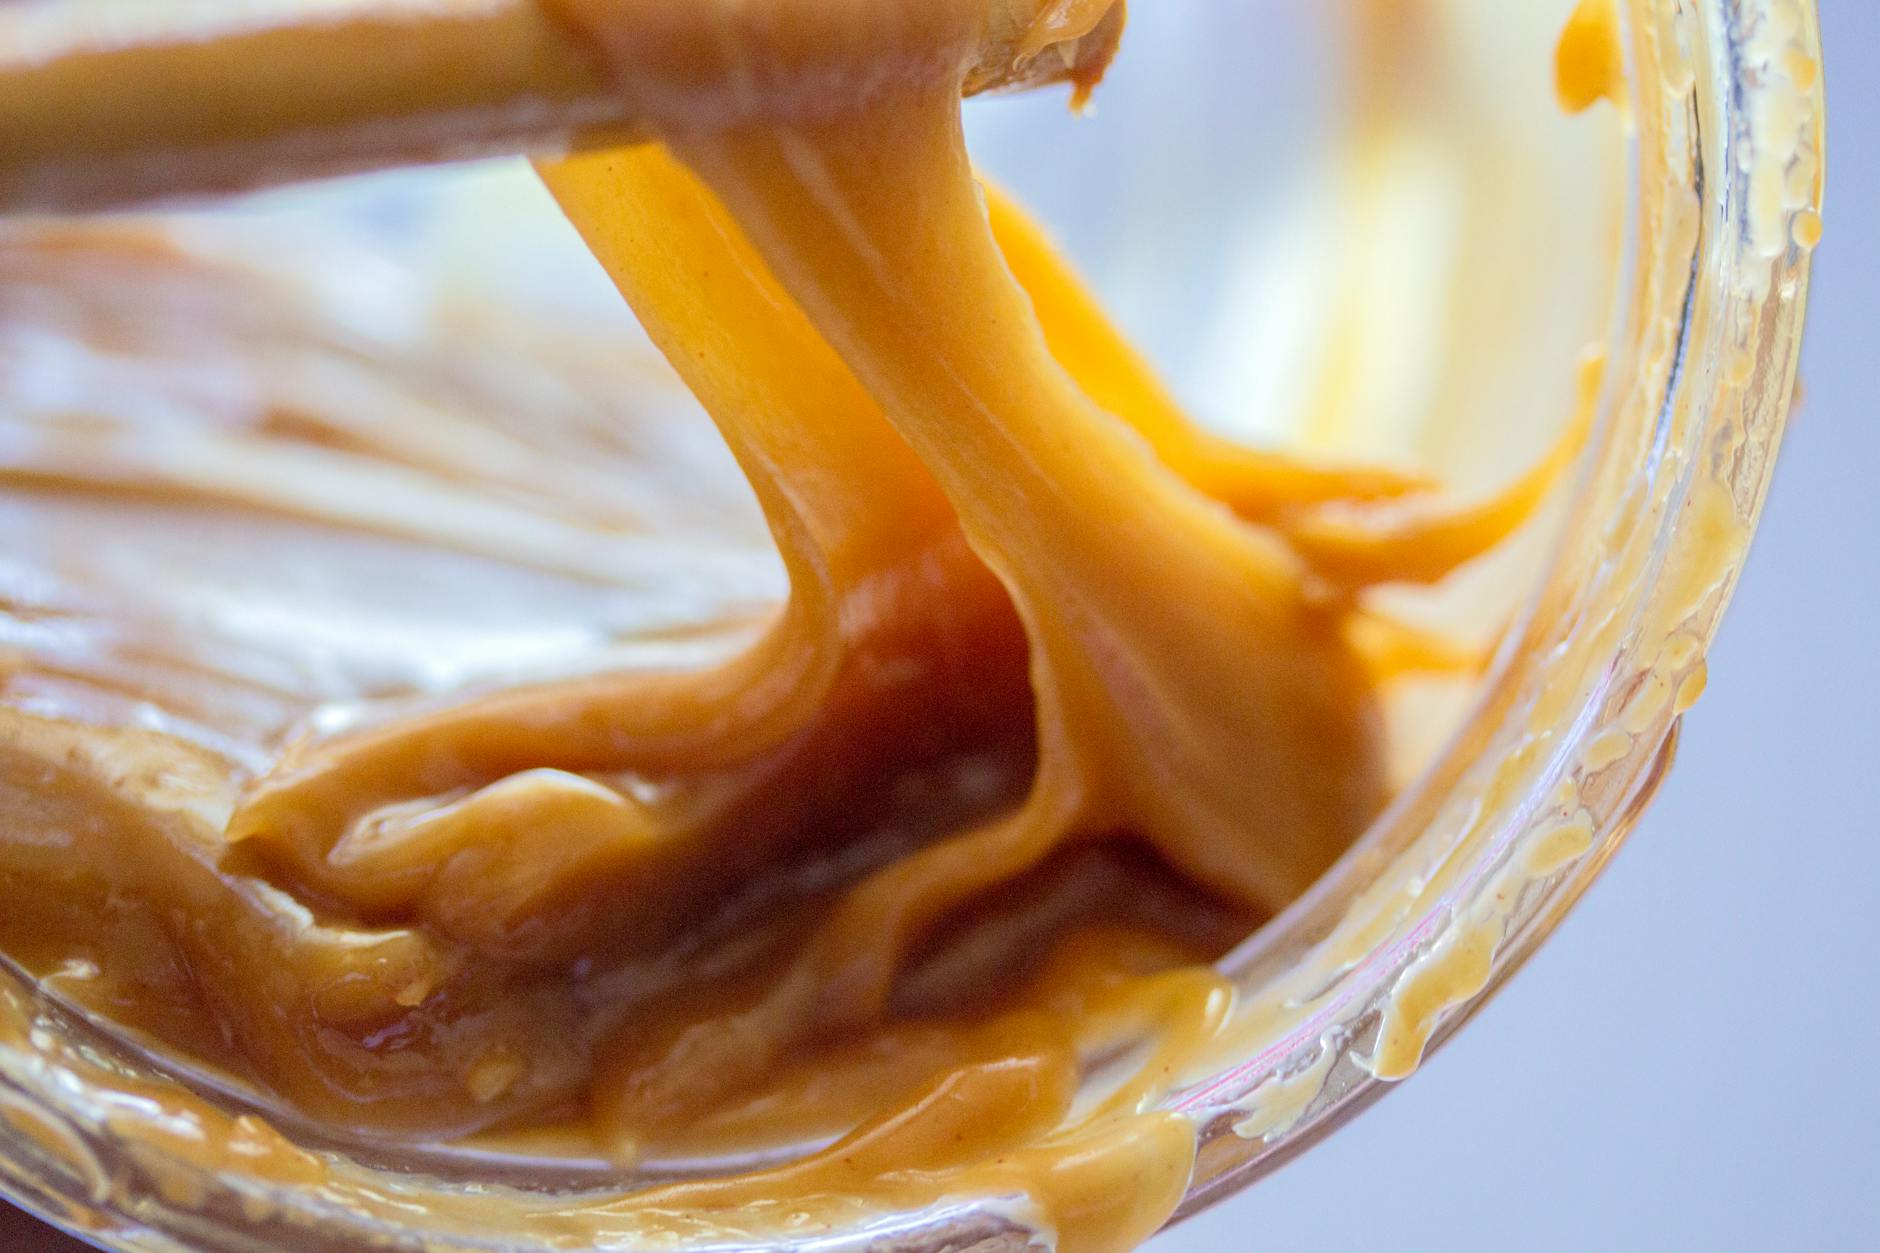
It will be pretty thin at this point which is a great time run it though the sieve without it taking all day. I found especially when I first started making it, that there would be chunks of sugar on the side and gave it a grainy texture. This will keep that from happening. I like to have the sieve on top of a Pyrex or heatproof measuring cup with a spout so I can easily pour it into a jar after it’s been filtered and slightly cooled. I make too much of a mess to pour into jar directly. Plus don’t want to risk the glass shattering due to the change in temperature.

Sugar… Spice…. And Everything Nice
Caramel is a great canvas for incorporating flavors. Both as far as adding flavors to it (like the salt) but also all of the things you can top with your caramel.
Flavors to Add to Caramel
Salt
Obviously we added some salt to this, but there are so many types of salt you could use. We have Fleur de Sel which is always a classic and melds into whatever sweet or savory foods you are adding. Maldon Sea Salt Flakes are the hotness on social media where it will standout in photos especially on cookies or brownies. If you wanted to add a little bit of extra flavor for your sweet and savory food, I do love smoked sea salt. I’ll use it in barbecue sauce or making s’mores to add a little bit of panache.

Vanilla
It drives me crazy how people call things “vanilla” when describing something basic. Vanilla is usually added to most sweet things because of the smooth and floral notes. Much like garlic, I typically double amount in any recipe.
There are a few ways that you can add those smooth notes of vanilla to your caramel, which will make it blend perfectly over pancakes, cinnamon rolls, ice cream, or just as an extra way to fancy up your salted caramel gift jar.
The easiest way to add vanilla is to take a vanilla bean and slice it length wise and scrape the seeds out and add it to the hot caramel.
Or if you are like me, buy vanilla beans for making vanilla extract, but then I have the ends (because the bottle was too small!) and a few left over, so I made vanilla sugar. I took 2 cups of granulated sugar, split one vanilla bean and scrape out the seeds and add everything to a food processor. Blend and there you go! Vanilla sugar. If you decide to add vanilla sugar, use parts of it in lieu of the sugar used in the caramel to add those notes.

Brown Butter
There isn’t a lot to tweak in caramel, we already talked about the salt, the sugar, and last we will talk about the butter. I’m a big believer in salted butter, mainly because I don’t want to have to buy something else, but browning the butter makes a huge difference in anything you cook with it. It’s super easy and only takes 5-10 minutes.
Add your 5 tbsp of butter to a sauce pan, and make it a one pot wonder by doing this before cooking your sugar, and put it over medium heat. Stir it until it melts, and once melted you should see it start to foam. Keep stirring it until the bottom of the pan starts to turn a golden brown and the butter starts to smell a little toasted and nutty. Once it has gotten to that point, remove from the heat and pour into a separate heatproof container.


Booze
Caramel, vanilla, and sweetness are some of the key components of a lot of booze flavors. Adding a tablespoon of bourbon or whisky can add a new depth of flavor with the alcohol soluable compounds. Adding the alcohol to the the caramel when it is sill hot or after the cream, will begin to cook off the alcohol taste while still keeping that boozy taste. This bourbon or whisky caramel is great for special desserts like pecan pie, cinnamon roll, brownies, or other holiday desserts. Also think about making your coffee a little fancy by adding a teaspoon or so at a time until you get the desired flavor.

Ways to Use Salted Caramel
Dessert’s Plus One
Caramel is probably most associated as part of dessert and for good reason. It makes for a delicious topping for ice cream, on top of fruit cake your aunt gave you that needs some help, brownies (can’t recommend this enough!), cinnamon rolls, pancakes, cheesecake, or on top of pies like pecan or apple!
Consider making some thumb print cookies along with this Apple Butter for the Holidays to go in the center and drizzling some caramel over the top. Or if you want to serve the cookies slightly chilled, you can use them as the filling too!

Condiment
It can’t go without saying how wonderful caramel is as a topping. It’s delicious as a dipping sauce. Dip pound cake bites or marshmallows into it or for a lighter option, dip fruit into it. If you want a salty bite, you can pour it over popcorn or over pretzels to counter balance that sweet bite.

Drinks: Sip It, Drizzle It, Stir It In
It’s the holidays, you have time off and you are trying to be good and not go out, but you still deserve your sweet treat every day. Look no further. A
Coffee
Add a few teaspoons of caramel in to hot milk or espresso for a caramel latte. No matter if it’s hot or iced, a cappuccino or a flat white it will give a sweetness without all of extra chemicals found in store bought syrups. Plus add chocolate to the drink and you have another flavor to pair it with.

Tea & Cider
I recognize not everyone is a coffee drinker. I don’t know how you do it. I do love a chai latte and this caramel does not disappoint. Black tea, chai and rooibos are great blends to add to your caramel.
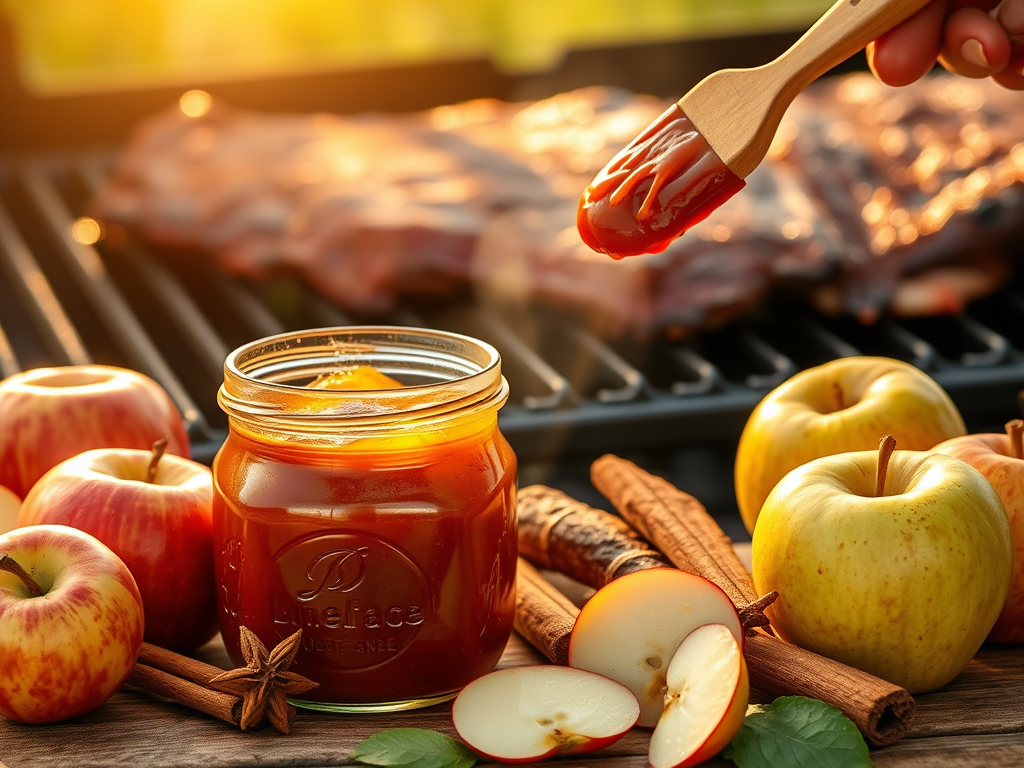
If you are feeling the holiday spirit, consider adding in a teaspoon to hot cider to add that caramel apple nostalgia to the beverage.

Adult Beverages (Getting Saucey in More Ways Than One!)
Espresso Martinis are all of the rage right now and because we were already adding it to our morning coffee, you can also add it here. Whether it is mixed into the drink or add a drizzle to the inside of your glass or on the rim.
If the martinis are not your thing (I get it, it’s a lot of work) you can also add it to a White Russian or your Irish coffee.

Jar It, Gift It, Repeat
Gifts made at home can be more meaningful than anything you bought at the store. If you are looking for gifts for teachers, family members, coworkers, neighbors, service workers (mailman), as a thank you gift, or hosts. This makes a great gift standalone or in addition.
For my favorite people at work, I made a quadruple batch of caramel and gifted them in half pint jars (8 oz) and at less than $3 per half pint, it made a gift that could be remembered and not break the bank. If you want to go above and beyond, you can make gift as pints. To me, it just make sense because most individuals are using it for the holidays and special occasions, plus if for whatever reason they are not a fan of caramel, they can try it without wasting too much.

It’s great for the coffee lover, pair it with a bag of coffee and a mug to make it super thoughtful! It’s great for the foodies because they can add it to their desserts. For the homesteaders in your life, you can gift it because it’s thoughtful, homemade, small batch with simple ingredients. It’s great for holiday gifts since it travels very well and doesn’t need refrigeration. Gifts for the teachers, neighbors, and service workers because most people like caramel, it’s not overly personal, and doesn’t contain any allergens except for dairy. Even those people who seem to have everything, it doesn’t add any clutter, consumable, and indulgent for for those special moments.
Storage and Safety
I love this recipe because I can keep it on hand without having to make extra efforts to preserve it. This recipe has been tested to determine if it is time and temperature safe, and because of the low water content and the large amounts of sugar, I keeps it safe without refrigeration or canning. Because of this, I refrain from adding any additional cream, water, and not more than the tablespoon of bourbon to the caramel as that will add more moisture and water content to the recipe. That can increase the likelihood of spoilage.
With that said, always make sure you are using clean pots and utensils, and any accessory or vessel like a sieve or jar are also clean to reduce any possible contamination.

Room Tempearture
You can leave it out at room temp for two or three months in a clean airtight jar if kept in a cool and dark location (pantry is perfect!)
Refrigeration
If you want it thicker or want it to be out of eyesight and for a special treat, consider storing it in the back of your fridge. It will thicken up a significant amount in the fridge where it is almost scoop-able. If you want to thin it out, you can microwave it in short bursts (20-30 seconds) or create a water bath.

Freezing
If you want to freeze it, make sure you use jars with the appropriate headspace (no shoulders on your jars!) or silicone molds. They will thaw beautifully overnight in the fridge or at room temperature.
Spoilage
While incredibly unlikely, if you notice anything growing on it, fuzzy or fizzy texture, off or sour smell, or any fermented texture, don’t be a hero. Get rid of it.
If you notice it being very thick or hard chunks, that is likely just the sugar crystallizing and is normal sugar behavior. Heat up to ensure it is smoothed out and not grainy.
Sticky Questions, Answered: FAQ
Is salted caramel safe to store at room temperature?
Yes! This recipe is high sugar and low water which makes it shelf stable presuming that you have clean jars and utensils.
How long does it last?
Room temperature it will last 2-3 months. In the fridge will last up to 6 months. In the freezer it will last for 12 months.
Why did it turn grainy?
Unfortunately it’s just the nature of sugar. Because it is so low water, the sugar crystals can settle out. It is not ruined!
Can I fix grainy or separated caramel?
Yes! If it was in the fridge or while you are cooking the caramel can seize up and crystallize. To fix this in either situation, add to low to medium heat and stir quickly with a whisk.
Do I need any special tools?
Nope! You can can just use your pot, whisk/wooden spoon, and a measuring cup. You can use a candy thermometer if you like to be thorough and know it’s done when it gets to 220 degrees.
Why is the caramel so thick now?
Caramel will be the thinnest when it is freshly cooked. As it cools the sugar will be concentrated and will create a very thick sauce. If you need to be able to pour it, heat it up gently in the microwave or over a water bath.
Is it safe to gift?
Yes it makes a great gift for anyone who loves coffee, food, or you want a budget and thoughtful friendly gift for friends, neighbors, coworkers, and family.
Can I make it dairy free?
Yes, but it will have more water than the heavy cream. You will need to refrigerate it if you use coconut milk.
Can I double or triple this recipe?
Yes! I quadrupled the recipe with a 6 qt pot. Just make sure you keep the heat low and you are prepared to stir for a while.
Why does my caramel taste bitter?
Unfortunately that means the sugar burned before you had a chance to add the cream and butter. Don’t leave the sugar alone while you are cooking it, make sure you stir often, lower the heat if you need to, and as soon as it all turns light brown and is dissolved, add your butter.
Why did my caramel separate?
It’s natural fat separation. Warm it gently in the microwave for 20-30 seconds and stir. Repeat until combined. Or heat it gently over medium low heat in a water bath.
What’s the difference between caramel sauce and caramel syrup?
This caramel sauce is thicker and richer with the butter and cream. It’s part of what keeps it shelf stable. Syrup is thinner, has more sugar and water.

Before You Leave
Whether you keep it classic or dress it up with vanilla bean, brown butter, or a splash of bourbon, this salted caramel is one of those small kitchen wins that feels extra special every time you reach for the jar. If you give it a try, I’d love to hear how you use it. On desserts, in drinks, or straight from the spoon (no judgment here).
Leave a comment below and let me know which variation you made, and if you found this helpful, don’t forget to save it or share it with a friend who loves a good homemade treat.

Easy Homemade Salted Caramel Sauce
Equipment
- 1 2 Quart Sauce Pot
- 1 Measuring Cup
- 1 Candy Thermometer optional
- 1 Wooden Spatula or whisk
Ingredients
- 1 cup White Cane Sugar
- 6 tbsp softened butter salted or unsalted
- 1/2 cup heavy cream room temperature
- 3/4 tsp salt kosher
Instructions
- Measure out all of your sugar into sauce pan. Divide butter into 4-6 pieces for even melting later. Pour cream into a measuring cup to allow to come to room temperature or microwave for a short period until warm. Have a sieve ready along with heatproof container for later.
- Heat sugar over medium heat and stir with a wooden spoon until fully dissolved. Will take 5-7 minutes. Scrape sides and break down large sugar crystals that develop. Do not let burn. Once all dissolved and no crystals are visible, change heat to low. Should be an amber or light to medium brown color1 cup White Cane Sugar

- Add butter slowly to pot and whisk to combine. Stir over medium low heat until all butter is dissolved6 tbsp softened butter
- Once all butter is melted and everything is combined, slowly add cream while stirring constantly. It will bubble profusely. Once all cream is combined let cook over medium high and allow to come to a boil. Then for one minute undisturbed.1/2 cup heavy cream

- Once the minute has passed, turn off the burner and add salt. Stir to combine.3/4 tsp salt
- Pour salted caramel through a sieve in to a heat proof glass to remove any sugar crystals that did not dissolve. Allow to chill slightly before storing.

Notes
- Storage: Store in a clean, airtight jar at room temperature for up to 2–3 months. Refrigerate for longer storage if desired.
- Clean Utensils: Always use a clean spoon to maintain shelf stability.
- Butter: Unsalted butter is recommended. If using salted butter, reduce the added salt slightly.
- Salt: Fine salt dissolves into the caramel; flaky salt works best as a finishing salt.
- Flavor Variations: Vanilla bean, brown butter, or bourbon may be added without affecting shelf stability. Avoid adding water-based ingredients if storing at room temperature.
- Texture: Caramel thickens as it cools. Gently warm and stir to loosen if needed.
- Safety: Caramel is extremely hot when cooking. Use a deep, heavy-bottomed pot and stir carefully when adding cream.
- Nutrition: Nutrition information is an estimate and will vary based on ingredients used.


Leave a Reply