Being in Zone 8A, we are lucky to have a longer than normal garden season, but even here in the North Texas, Southern Oklahoma, it is still too cool to put the vegetables in the ground for a few more months. To make the most of it, especially before it gets too hot, we want to take advantage of the early spring so we need to plan our seed starting.
That means if you followed my Plan Your Garden in January: The Best Time for Beginners or Your Garden Plan for Success: 5 Essential Tasks for January, you know this is a great time to purchase your seeds and get any seed starting materials. This post will focus on some of my favorite seeds and supplies you will need before you get started.
I am linking some products in the paragraphs below and none of these were a gift, paid for, or even discounted. These were all things that were purchased retail by me and my family and they are on here because I love and believe in the product. I returned and will not speak of (at least not in the post) of anything that we are not using or would not recommend.
That being said, as part of this seed starting guide, I will provide some affiliated links that will allow me to earn a small commission if you decide you want to make a similar decision as I did and purchase some of these great products (Win Win!)
Seed Starting Essentials
Seed Trays
Before you ever put seeds into soil, you will need a container to put them in. The good news is you can be just about as creative as you like with this part! My grandmother saves old cups from her favorite fast food stop, I have used a wide variety of formal seed starting trays, but you could also use Tupperware, jars, eggshell cartons, or if you have gardened in the past, it’s great to breakout those old potting containers you get from the nurseries after you put your plants in the ground.
While the sky is the limit as far as your creativity there are a couple of things to keep in mind.
Plastics and Styrofoam
While I loved my grandmother’s ingenuity for reusing something that would otherwise go to the dump, I do not love the idea of plastic containers simply because there is already so much plastic associated with our food these days. That same sentiment would be applied to most Tupperware, and if you are thinking about using egg cartons, perhaps consider using the cardboard kind to limit plastic or styrofoam.
Depth of Container
If you have ever seen plants from a nursery, some plants may be root bound where their roots are densely packed and spiraling in on itself. One of the perks of growing your own seeds, is to be able to control for the health of your plant. Having a shallow container will mean that you will not get the strong root development that will ensure your plants are successful when they are either potted up (put into a larger container) or transplanted into the ground.
My other issue with jars or some Tupperware, is that they are too deep. I want to plant a lot of things, and soil is not exactly cheap. Because of this, I want to make sure I have the most efficient use of soil as possible. Having too much soil may create issues pulling the plant out of the container if there is not a strong root ball. Plus it could just take up more space if you are wanting to plant multiple things.

How Will You Water Your Plants & Humidity
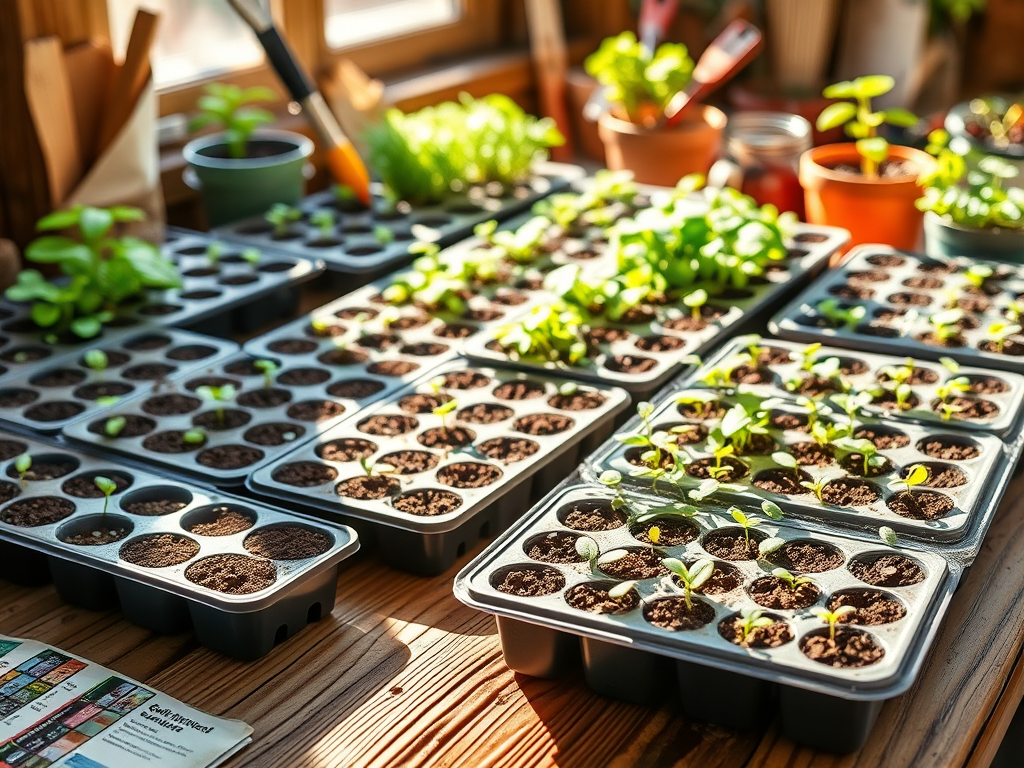
Water, light and soil are the most important things when discussing plants, so to address the first aspect, when selecting your container, consider how will you water your seedlings. They make many different trays that have a wide variety of watering features including self watering, a separate tray to collect water and to help “water from below”, and domes to help maintain humidity to ensure the soil doesn’t dry out.
Having tried small pots, cups, self watering trays, and pop up seed starting trays, I do find that the pop up trays to be my favorite. I don’t care for many cups or small pots because I do not care to deal with 10-20 seeds at once. Things at home may pop up where I want to stop what I’m doing and if I want the option to be able to pause. I found it too hard to fertilize seedlings for self watering options and
Your budget should always come first when you are deciding where you want to grow your seedlings, but when you consider this, keep in mind these key components:
- How many seeds can I fit in one tray?
- How will I water it? Is it self watering? Am I bound to water from above? Can I water from below?
Top Picks for Seed Starting Trays
Burpee 36 Cell Seed Starting Tray | Burpee 18 Cell Seed Starting Tray : I love these for most of your smaller seeds (Not cucumber, squash, beans, or peas). They have a silicone bottom that makes potting up or transplanting super easy and minimal risk to damaging the plant. They are reusable so you can keep them year over year, and I have the option to water from below to keep the soil moist and to limit dampening off disease. My only issue with this tray is that they are not as deep as I would like nor do they have a dome to hold in humidity. The dome is resolved pretty easily with a little bit of plastic wrap.

The Epic 16-Cell Seed Starting Tray, Epic 6-Cell Seed Starting Tray and the 4-Cell Seed Starting Tray: I purchased these after the original Burpee 36 Cell/18 Cell trays, and they have been great. I love their quality. They can hold up to so much. They are my go to trays especially for potting up for those smaller seeds, or they are my go to for the larger seeds.
Coupled with their bottom tray, you get the same benefits of watering from below. They have seed that are super deep, and when I grew with them this last year, and the root structure was so strong. They have large drainage holes at the bottom that makes it very easy to pull the plants out for potting up or transplanting. My only issue is that they didn’t have a dome, but they have recently released them in their store, but I haven’t had a chance to try them out.

Soil and Amendments
Aside from having a place to for seed starting, you also need to make sure you have the right growing conditions for soil. Some of the important things especially for your smaller seeds, you will want to make sure that it does not get too compacted in your container. Which is why you will generally see potting soil recommended versus garden soil.
Especially for smaller seeds, you are looking for potting soil that is fine enough that it doesn’t have large pieces of bark, rocks, or other organic material that might hinder the seedling to come up as it is germinating.
Why Not Use Soil Outside
When I first started gardening, I wanted to spend as little as possible, so it made sense to just dig up some dirt. The other option I thought of was using old potting soil that had been outside after my plants had passed on from their last growing season.
While that’s a great idea, this will not be a practice I will use (or minimally), simply because there are so many bugs and pests in the soil and bringing them inside my house is not something I’m looking forward to dealing with in the future. Similarly, there are so many things you can’t see in your soil, whether that be bacteria, fungi, and not all of them are friendly. Coupled pests, disease, and compaction (as we mentioned earlier), using soil from the ground, while cost effective, may come with more problems.
If you are really insistent on using something from outside, you might consider microwaving your soil (60-90 seconds per pound) to help kill off any weeds, bacteria or fungi. Just make sure there are not excess metals in your soil before doing that!
Seed Starting Mix
While they do sell some mixes specifically for starting seeds, and I have bought some, they are not completely necessary. The benefit is that they are pre-sifted, fluffy, and have minimal nutrients so you do not risk burning your plants with too much fertilizer early on. I just don’t think they are worth the price.

Potting soil that is fluffy, is well draining, but can stay moist is the ideal soil.
Instead I’ll purchase an organic potting soil and remove any of the large chunks of wood or debris, and if the soil will help particularly small seeds, I might pass it through a soil sieve. If you have left over hardware cloth, I’ve seed people take large amounts of soil and filter it through that pretty quickly.
Amendments & Fertilizing
Potting soil can be great, but depending on your climate, you may want to make some adjustments. You might also have made the decision to make your own. In these cases, you may want to add some amendments to your soil. I love to add vermiculite to my seed starting mix since it helps with water retention and if you are growing particularly fussy plants, like celery or petunias, they need to have light to germinate. Vermiculite is a great option for helping hold in water so your seeds stay evenly moist while also allowing light to pass through.
My biggest mistake when planning my garden the first time is not knowing when or how often to fertilize. I was so worried because many of the blogs and videos talked about ensuring that there are minimal nutrients in the soil, I didn’t want the plants to die because I loved them and gave them too much!
I realized after my first few plants, I could be a little more generous than I was. While it’s important to not give them too much, if you’re diligent about measuring the amounts, it’s not something to be afraid of. I got into a rhythm of giving something to my plants every week whether that be minerals or fertilizer and my plants grew to be something I was proud of.
Top Picks for Soil, Fertilizer, and Amendments
- Burpee Organic Potting Soil Mix or Espoma Organic Potting Soil Mix: My go to’s if I need a little bit of soil, but if I’m using large amounts, I usually go to my local store to buy an organic bag from Whitney Farms.
- Vermiculite: My go to brand since it is nice and fine, it easily incorporates into my soil or as a stand alone.
- Miracle Grow Organics Fertilizer: I know this brand comes with a stigma, and while I have tried others, this seemed to give me the best results. I don’t want to use the blue crystals from the regular brand, but I find that an 1/4 of a teaspoon for the first month of the plant’s growing cycle mixed with a quart of water and graduating it up to a 1/2 of a teaspoon as it has a few more true leaves, works great and I only have to do that every two weeks. If you don’t use this, do make sure whatever fertilizer you use is water soluble so your plants can absorb the nutrients easily.
- Organic Seaweed and Kelp Fertilizer: While it offers nothing for Nitrogen, Phosphorous, or Potash/Potassium, I added this to help with minerals and micronutrients for my plants.
Lights
Having something to grow in and a medium for which to grow in, the only thing left you need is light. If you aren’t using the best free energy, as in the Sun, by using a cold frame or a sunny window, you will likely need some type of light to help your plants grow.

We have a dedicated area for all of our seed starting to keep everything in one place including the grow light set up, our fertilizer and amendments.
Time & Light Temperature
There are so many options, and I’ve tried a few of them, but ultimately it’s good to have lights that can be programmed for minimum 12 hours, but ideally somewhere for 16-18 hours since nothing will ever be as strong as the Sun.
You will also want something that is labeled as full spectrum or daylight so that the lights have both infrared and some ultraviolet capacity to it. That will ensure that your seeds have the best opportunity to grow in conditions that are at least mimics of the sun. This is commonly measured in Kelvins and you are looking for something similar to 5,000k – 6,000k
In addition to time and temperature, you are also looking for intensity measured in Lumens. Having the right amount of lumens will ensure that the intensity of the light will prevent any legginess in your plants to ensure they are healthy. I recommend minimum of 2,000-3,000 Lumens for seed starting, but if you plan to grow them more inside as large transplants, you may find something in the 5,000-6,000 range
Top Picks for Grow Lights
6,000K Gooseneck Full Spectrum Light : I use this for a lot of my herbs both for seed starting and for regular growing. What I love about this is that I can easily adjust the heads to be just a few inches away from the plants to get the most intensity. I do not love the timer as it goes to a maximum of 12 hours and if the power goes out, then they have to be manually reset. This is great if you are planning on having a few different kinds of seeds that won’t be crazy big before you put them outside

Gooseneck lights are great for maneuvering the light to ensure an even spread for all of your seedlings.
Monios Plant Stand with Grow Lights: I unfortunately did not know about color temperature when I first asked for this for Christmas one year. We don’t love the daylight color of lights in our house, so we have a yellow version of this. But, even without it being the best temperature, this is where I do the bulk of my seed starting.
It is great if you are wanting to spoil someone on their seed starting journey, and it an hold several trays of plants. It comes with the lights (this being the correct temperature) and your a pair it with a smart outlet to turn on and off for you whenever you want. Or it comes with a switch. If I had the right lights, I wouldn’t see much fault in this. It took me an hour or two to put together, but the lights are relatively adjustable. Definitely worth the investment.

Dimmable 6000 Lumen Grow Light : I do feel like as far as grow lights go, this is the heavy duty, you are serious, of them all. Once I added these in March to my grow setup, things got intense. Plants were strong, they would grow arguably overnight. I couldn’t tell if it was because of the color or the light intensity (or both) that caused the success, but I saw the most results with these lights.
They are not cheap or flexible, but cover a good area, and you have an easy option to daisy chain them if you get more than one and work well (unlike the gooseneck) to pair with an outlet so you’d an set and forget a little bit more. They are not easy to adjust for growing plant height, but with this light being my solution after I have began to pot plants up, it ended up not being too much of a problem.
These lights at full strength are intense, and so much so that this link is not even the full powered one. There is a dimmer that if you were using this to start your seeds in then I would consider having the dimmer set to a lower intensity and building it up as the plants get larger.

Again all of these things that I have mentioned above as part of lights, soil, or containers, I have been directly purchased with no sponsorship or even a discount. I put the products through my pressure test, and while I have had no problems returning products if they didn’t suit us for one reason or another these are what I would buy again if given the option.
Seedling Temperature
It’s important to be mindful of the temperature you need for each of your seedlings. Depending on what you are planting the seeds you have might need to be made extra warm this time of year, or be made even colder
Cold Stratification & Vernalization
Seeds like garlic, lavender, milk weed, and most fruit trees need some amount of cold stratification or vernalization. Cold stratification will trick seedlings to think that the cold wet winter months have ended and it’s safe to sprout. Versus vernalization triggers the plant to think that we want it to flower or bulb later in the year.
I got exactly 0 lavender my first year because I tried starting it inside. However, I put it in the fridge for a month or two before planting it, and they popped right up. Similarly with garlic, especially long day, will need more amount of cold temperatures to form a big bulb. Flowers like milkweed, echinacea, bluebonets, bee balm, lavender, shasta daisies all need a period (at least a month) of cold stratification before they will germinate. Herbs like sage, thyme, and chamomile also tend to do better with a little of cold stratification as well. Garlic is technically vernalization, but is also a plant that does well with a cold period.
If you have seeds or bulbs that need extra cold, the best way is to put it in a brown paper bag (for large bulbs) and stick it in your refrigerator before planting. Doing this for a few weeks to a couple months will give most seeds plenty of time to get those chill hours.
Staying Toasty Warm
Alternatively, there are a lot of seeds that want it significantly warmer to germinate. Even in Texas and Oklahoma where the room temperature is between 68-72 degrees, I still use a heat mat for seedlings like tomatoes, peppers (especially your super hot varieties), eggplant, and tomatillos. Herbs and flowers like zinnias, marigolds, rosemary, and basil are other plants that love a little extra warmth. There are other plants like zucchini and squash that love the heat as well, but they grow so fast, January is not likely the best time to start them.
Because I like to start these in the winter, they always get put on a heat mat like this in order to control the temperature. Setting the thermostat at 80 degrees will make most of your seedlings who like that hot summer temperatures very happy.
Wrapping Up
This spring is going to be a great time to plan your garden and while there is a lot more that goes into starting your garden from seed, including humidity, air flow, and temperature, this is a great place to start. Be sure to add your email address to our newsletter to see when we are posting more tips about starting your garden.
Do you have other seed starting tips or products you like to use to get your garden started for the year? What do you like to start in January/February? What are your go to’s for a bountiful season? Share them in the comments below!


Leave a Reply